How to search for a companion after an avalanche

Avalanches. They are a scary business. So if you spend a lot of time skiing the deep stuff you should not only have all the right avi kit, but know how to use it – so if any of your buddies get caught, you can jump to action (and they should be able to do the same for you).
The exact organisation of a rescue will depend on the number of victims, rescuers and the situation. Here we are going to focus on the most basic, one-to-one rescue.
There are two possible scenarios; the first, where you witness someone being avalanched, the second where you come across a situation where someone has been avalanched.
Let’s start with the first. If you see someone being avalanched, watch where they go – if they vanish under the snow mark in your mind the last point where you saw them. If you deem it safe to enter the area*, ski in and mark that point; a vertical ski pole is ideal. Now you do not need to search the area above that point. Look for visual clues; it is easy to get focused on your transceiver and miss the foot, glove or hand sticking out of the snow.
If you come across an avalanche incident, hopefully a search will already be underway. If not, find out how many people are buried, and ask the witnesses to turn their transceivers off and get out their shovels and probes. If they haven’t already started searching they probably don’t know how to, so don’t waste time finding out.
Make sure all the other transceivers on site are switched off, and ask someone to make a manual visual check so you don’t waste time following a false signal – a victim has a 92% chance of being dug out alive if found within 15 minutes, so time is of the essence!
*Only perform a search if you feel it is safe to do so; do not put yourself or your team in danger. Adding more victims is bad. In most scenarios once an avalanche has occurred, the slope is stable – but there are occasions when this may not be the case. The most common situation where you may choose not to perform a rescue is if there is a risk of a secondary avalanche, or you have to go under a serac (unstable ice cliff) to perform a rescue.
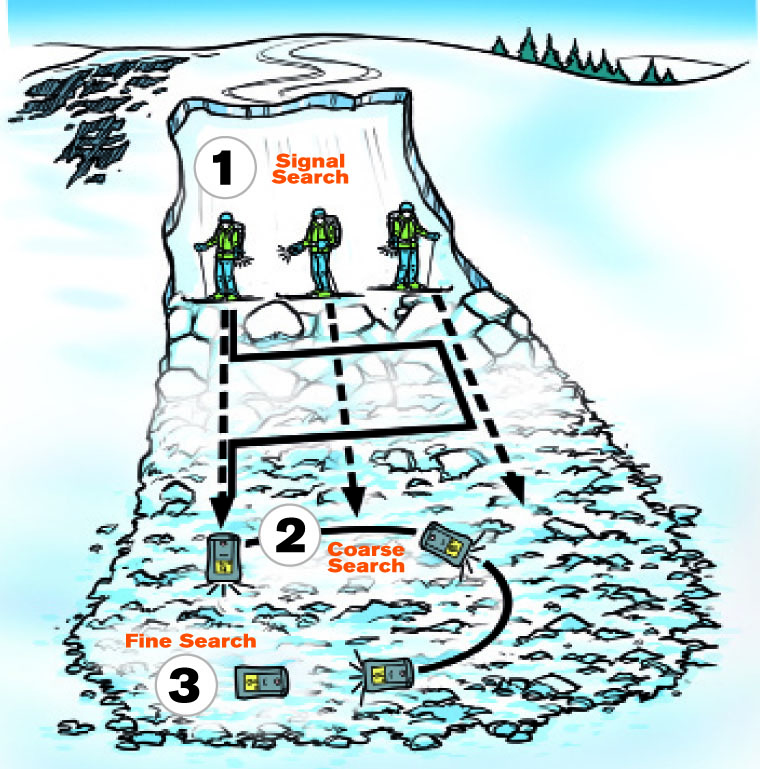
This is the first phase of the search, and you need to make sure you cover all the debris (if you have marked the last seen point you can start there). Here are the key steps:
a) Traverse the slope on foot or ski depending on whichever is easiest. Move horizontally across the top of the search area 20m in from the edge of the debris, then drop down 40m then traverse again until you are 20m from the other side.
b) You have to assume that the victim is buried deeply, is lying on top of their transceiver, and has weak batteries; all of these factors will reduce the signal strength. This search pattern will ensure that the victim is not missed on the first pass.
c) Move quickly looking for visual clues. You may pick up an intermittent signal at extreme range which can be confusing. Keep going with your signal search until you have a solid lock – you are unlikely to get this until you are within 40m of the victim. Keep moving until the unit reads less than 40 metres.
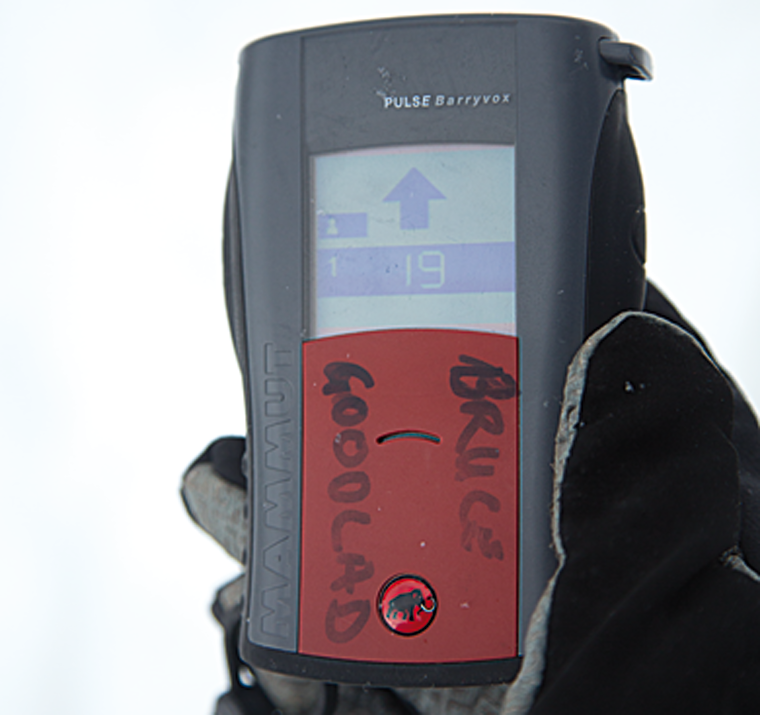
Once you have detected the signal, follow the direction and distance indicator on your transceiver. Keep moving quickly.

As you reach 3m from the victim, put your transceiver down next to the snow and use the distance display to find the minimum reading. Mark the minimum point on the snow. Keep your unit in the same orientation (always pointing the same direction) during this phase.
When you get close, the easiest way to get the minimum reading is to use a system referred to as ‘bracketing’. Get as low a reading as possible on your unit as you come in – you may go past the victim and the numbers will increase. If this happens, go back to the minimum and, keeping your unit in the same orientation, move the unit from side to side again looking for the minimum.
You may have to repeat this procedure to reach the minimum. When you have found it, mark the point with a hat or glove so you don’t lose it while you are getting your probe ready.
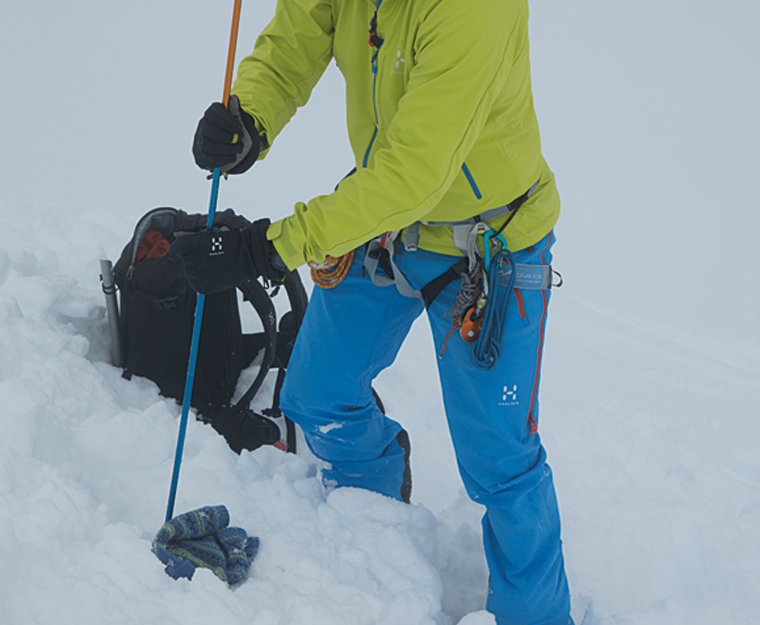
Get your probe out and probe perpendicular to the surface of the snow. Start at the lowest reading you got from your transceiver. If you don’t get a positive strike, move out 25cm and probe in concentric circles. Each new circle should be 25cm out from the last one.
When you probe, stand with your legs apart and probe vertically between your feet at right angles to the surface of the snow. When you get a positive probe strike (it will feel like a body, not a rock or snow; practise on a buried rucksack to get the feel) leave the probe in place. This does two things: it reassures the victim that you have not missed them and that you are starting to dig, and the probe also gives a visual reference. Once you start digging the snow all looks the same so you need a reference point.
Remember to always use gloves to protect your hands from a cold injury, and to avoid the probe warming up and getting snow stuck to it as this will reduce its efficiency.
Practise searches and avalanche scenarios are fun and can easily be added into a day’s skiing. The more practise, the quicker and easier it becomes. Gather some mates, find a quiet, spacious snowy area andget searching!
Photos: Kate Scott