How to: take kids ski touring


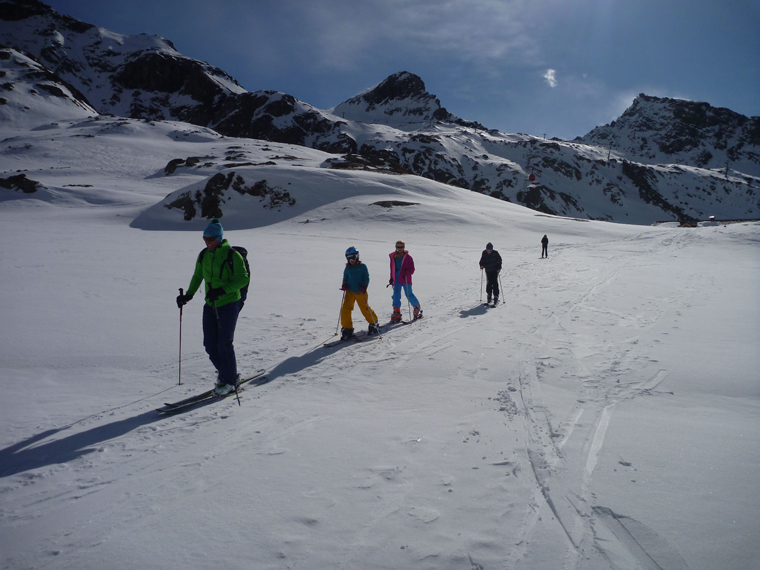
Once the kids are big enough for the backcountry, you may want to add a little touring to the family itinerary. You’ll want them to love it, and will dread putting them off, so here’s all I’ve learned about getting the balance right – to give them a taste of uphill action and the freedom of the mountains with minimal risk, and equip them with the right kit.
My mantra is “Start with why”. Before getting drawn into details, step back and ask what you’re trying to achieve. Are you hell-bent on dragging your family into the mountains because you’re bored with resort skiing, or are you passionate about sharing your love of the mountains with the most important people in your life?

Assuming it is the latter, I am with you. And we want to do everything in our power to share this love without putting the kids off. The best advice came from a friend who’s a professor in sports psychology. Tim Woodman’s wise counsel? “Make it fun, make it achievable, and stop before they’ve had enough.”
Remember, we are the converted few who know how awesome the land beyond the resort can be. But what’s in it for the kids? Well, our son Joe had no hesitation in answering this one: “Ski touring is exciting – it takes you to different places where other people can’t go.” He even acknowledged (yes, really) that it was “good exercise”. But if you can’t articulate – and the kids can’t grasp – why you are doing this, then the trip may fall flat.
When planning your itinerary, don’t bite off more than you can chew. And bear in mind the realistic scale of any uphill effort. I’ve never met a child who wanted to do any one thing for eight hours a day (except stare at an iPad…), so don’t impose an adult scale of events on the youngsters. When I asked our kids about the ingredients for success, they said: “Less than an hour of skinning every day is a great way to get used to it.”
Remove any sense of pressure from the day: far better to plan something moderate, and complete it in good time, in good form and good humour. You can always throw in an extra couple of laps on a lift, or get some extra sledging in if there’s energy to spare.
Walk yourself through the first complete day of your ski tour in your mind. Then you’ll know what to expect of the kit but, more importantly, what you’ll expect from yourself and the kids. Ask yourself: is this reasonable on day one? And take into account their experience, as well as your own at sorting out everyone’s kit.
Consider the distances involved, the technical challenges and what adverse conditions may do to the plan. Could you handle it? Do you have a plan B? And make sure everyone’s motivated.I believe in the self-determination theory when guiding. This suggests everyone needs the right balance of feeling competent, feeling in control and feeling this is a team they want to be a part of. You can usually pinpoint an issue with one of these factors when things take a motivational slump.
Get your kids involved in every little thing – planning the route, carrying (and taking pride in) their own kit. Talk through the differences they can expect from this next holiday and allow them to get excited. It’s a team adventure, and when you’re skinning uphill it’s easier if you know you want to be doing it. Of course, if this all seems too much faff, there is another answer to preparing the perfect tour: “Go with a guide,” sniggered the missus.
We snuck up on ski touring over years of varied wintersports holidays. I use that label as “ski holiday” doesn’t do justice to the range of activities on offer – all in the name of falling in love with snowy mountains. For us it was a combo of skiing mixed with snow-holes, fresh-air hot chocolates, sledges and slides.
A lot of Continentals will use cross-country skiing as a way to encourage an appetite for touring. That way you get the important features: the sun in your face and the wind in your hair, without the gnarl of off-piste terrain.
Wherever you end up, have plenty of ideas for things to do once the skis are off. One of the best things about a recent stay at the Orestes Hütte was the massive slide the kids built on the slope behind the hut. It was so good other guests wanted a turn. Before long, everyone was laughing and slithering. But, of course, even that wasn’t enough: “Can we build a jump next time?”
Play can be educational too. Build transceiver searches into games. Get into the hut and search for a cold cola with your transceiver. All you have to do is ask, “What’s in it for the kids?” and get creative.
Our kids have only just got to the stage where they can fit a pair of touring boots, so they have managed fine so far in regular alpine downhill boots. The secret for success with soft young skin is good quality socks. The kids never questioned skinning uphill in downhill boots, saying: “So long as you loosen them off, they are fine.”
With skis and bindings, there is a sliding scale of options. It is possible to buy a basic touring set up for kids, which allows them to skin uphill but offers nothing in the way of alpine binding release. Personally, I wouldn’t go there.
An ideal early compromise for us was the use of BCA Alpine Trekkers. While these might be viewed as an artefact that pre-date good touring bindings, they are a winner for family touring. The simple binding will clip into an alpine ski set-up; and the simple crampon-style fitting goes pretty small, allowing a kid with a junior foot size (Annie’s feet were a kids’ size 13 on our first skinning trip). Sure, the adults carried the metalwork when not skinning, but the kids loved them.
They are a great way to get kids skinning, and they allow you to enjoy the reassurance of a proper alpine set-up and release (even with rental kit) on the descent. Even better is that trekkers have gone out of fashion of late, so there are oodles of them to be found on ebay.
Proper touring boots and bindings start around UK size 4. With growing joints, I would always go for a binding with a proper lateral toe release, so Fritschi wins here.
You can save yourself a fortune by modifying a pair of old skins (or a cheap pair from ebay). The kids will require a longer pair of skis each year, so we use an old pair of over-long, straight skins. Just run a razor blade down the centre of the front half and split the skin to meet the edges of this year’s ski. Keep them too long, and fold the back end over for now (go for a pair with a simple tip fix).
Transceiver, shovel and probe is more of a philosophical issue than a technical kit question. Do you really want to get involved in all this? The idea of needing a transceiver on the kids was pretty abhorrent – but the idea of being out there off-piste and not having them seemed even worse. We resolved this one by (a) making it an educational issue for the future, and (b) managing the risk by ultra-careful route and terrain choice.
Get everything set up well in advance. By the time you’ve adjusted several pairs of Alpine Trekkers to the boots and bindings the kids might be bored of the whole event if it takes place on the slopes. Cut the scratchy labels out of their thermals, make sure the socks really fit, and get plenty of kit and spares.
Obviously, avoid avalanche terrain and crevassed glaciers. Similarly, avoid some areas with karst landscape and limestone crevasses, and beware routes with any combat skiing. Look for snowboard routes (especially on Swiss ski maps) as they tend to be the lines with the least poling, and avoid long flats or traverses.
Check whether huts are family-friendly. As well as the cultural differences (compare the French to the Italian view of engaging with kids, for example) there are some huts that are and some that really aren’t. If anyone feels anxious about sharing lodgings with unknown guests, take into account that the Italians and Austrians, as well as being more family-friendly, have a habit of smaller rooms and even en-suite facilities in their huts.

So where to go? For a first overnight experience, and perhaps a single night in a week of skiing, the Dolomites are riddled with amazing places to stay. Many of the huts are just off the lifts, meaning you only need to skin a short distance, if at all. Off the Sella Ronda, Pralongia is the perfect intro area – great tree skiing, easy tours, amazing huts, and never steep enough to avalanche.
From Cortina d’Ampezzo there are great huts around the Cinque Torri area. Some are accessible from the lifts (Scoiattoli, Lagazuoi), while some require a bit of skinning (Rifugio Averau).
Gressoney is my favourite place for an introduction to touring, by spending a week in the Orestes Hütte. Also in Italy – in the Dolomites – the Fanes hut offers a ride in a piste-basher up to an unforgettable overnight in the mountains. For really wee ones a simple ski (or even a sledge ride) down to the valley will be something they remember forever. This formula is easily repeated at the Amberger hut in the Sellrain; the Heidelberger hut in the Silvretta; and the Karlsruhe (Langtalereck) hut just off Obergurgl.
A skidoo ride or piste machine are great ways to get into the mountains and add a sense of awe and fun, spicing up a regular ski trip with an overnight experience. You can then do as much – or as little – skinning as you like.
Wherever you decide to give it a go, remember this is a team event, and you need to keep the team on your side. Share the decisions and keep the family involved and in control of the situation. Really, we are all just big kids and no one likes feeling out of control! The enemy of a fun ski touring debut is being hassled to go too far, too fast in an unknown direction. But get it right and there is nothing better than hunkering down in a stunning hut with your precious crew, as the snow laps down outside and the crowds have long gone…